• This community needs YOUR help today. With the ever increasing fees of everything (server, software, domain, e-mail) , we need help. We need more Supporting Members, today. Please invest back into this community to help spread our love and knowledge of IH Cub Cadets. You get a lot of great new account perks including access to private forums. If you sign up for annual, I will ship a few IH Cub Cadet Forum decals too in addition to all the account perks you get. You can see what it looks like below.

    Sign up here: https://www.ihcubcadet.com/account/upgrades

And It Starts....Electric Tractor

IH Cub Cadet Tractor Forum

Help Support IH Cub Cadet Tractor Forum:

This site may earn a commission from merchant affiliate links, including eBay, Amazon, and others.

Rbertalotto

Well-known member
Joined
Apr 14, 2020
Messages
187
Location
Boston
displayname
Rberrtalotto
Yea, I know its not a CC.....It's a Toro. I'm converting it to electric. I'll document the whole procedure and why I used what I used in an article when it's done. For now a tease....

IMG_20200524_122247196_HDR.jpg


IMG_20200524_122828354.jpg


IMG_20200524_123922455.jpg
 
I'm shocked at all I accomplished yesterday. I started at 10am with a complete Toro riding lawnmower.....Had all this done by 5PM!


Pulled the engine and anything else associated with it. Removed all the mower deck attachments. This tractor will have a front mounted mower with its own electric motor to make it easier to access areas of my property.


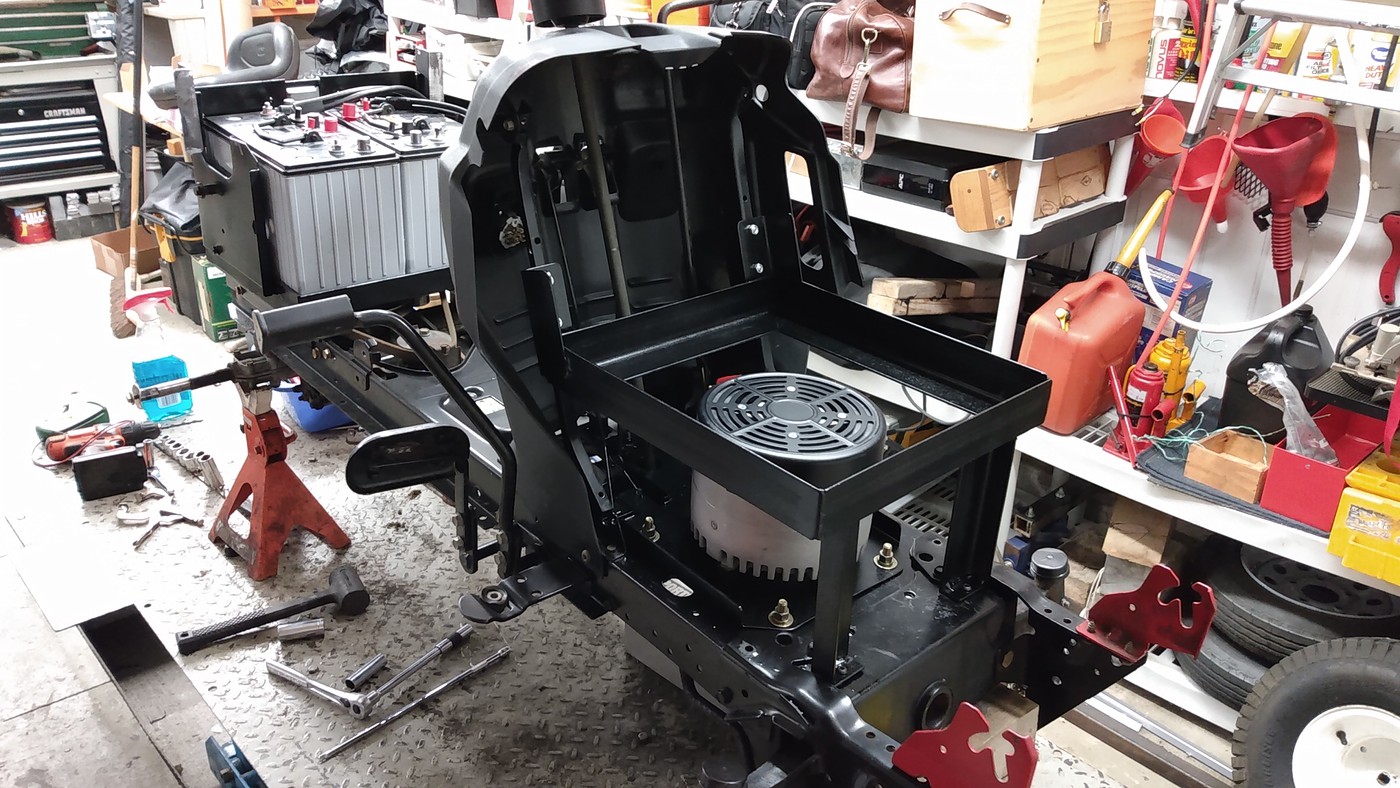
Found a piece of steel in my scrap pile to mount the motor. My DRO milling machine made locating the mounting holes a snap.


IMG_20200524_122156899-vi.jpg


While the paint was drying on the mounting plate, I removed all the pulleys and wire brushed the surface rust, checked bearings and reinstalled


IMG_20200524_195649955-vi.jpg


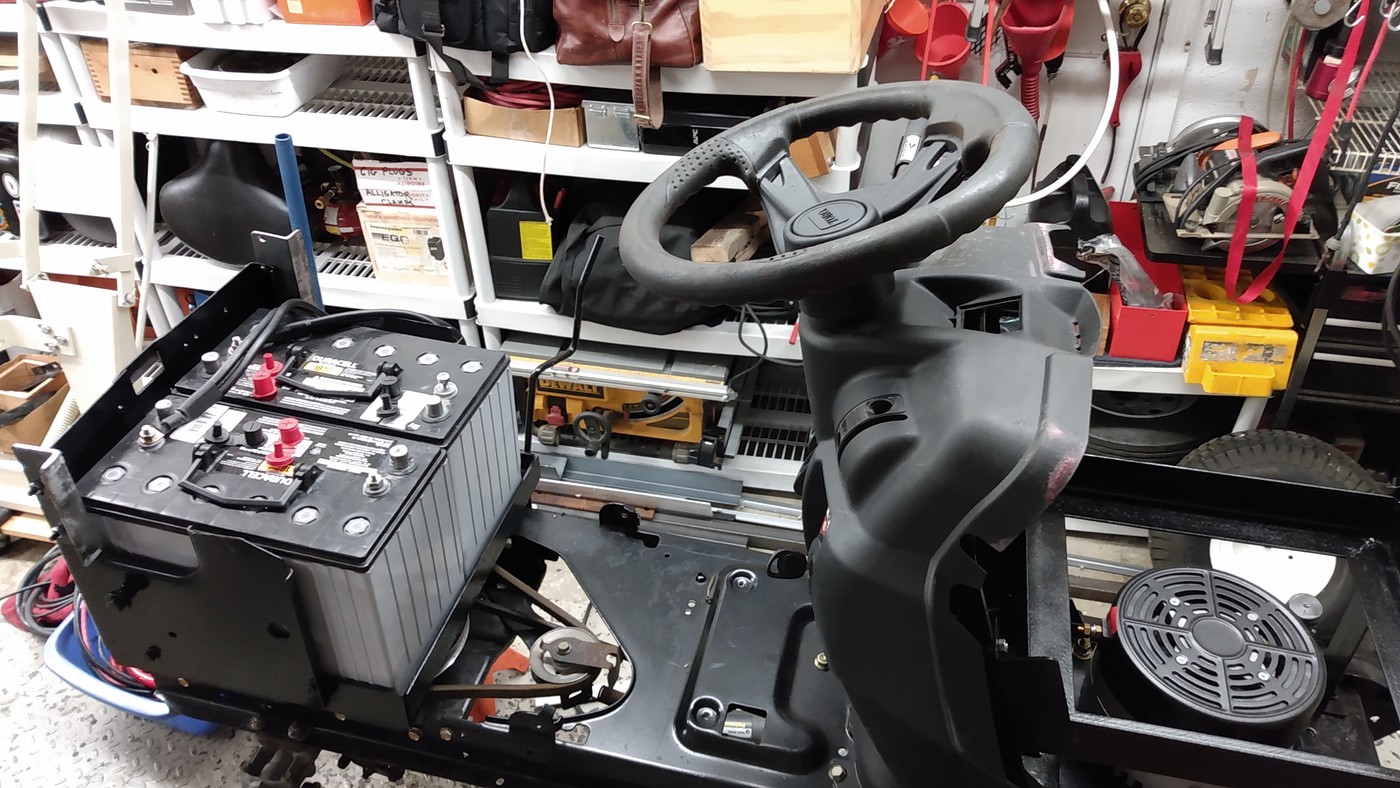
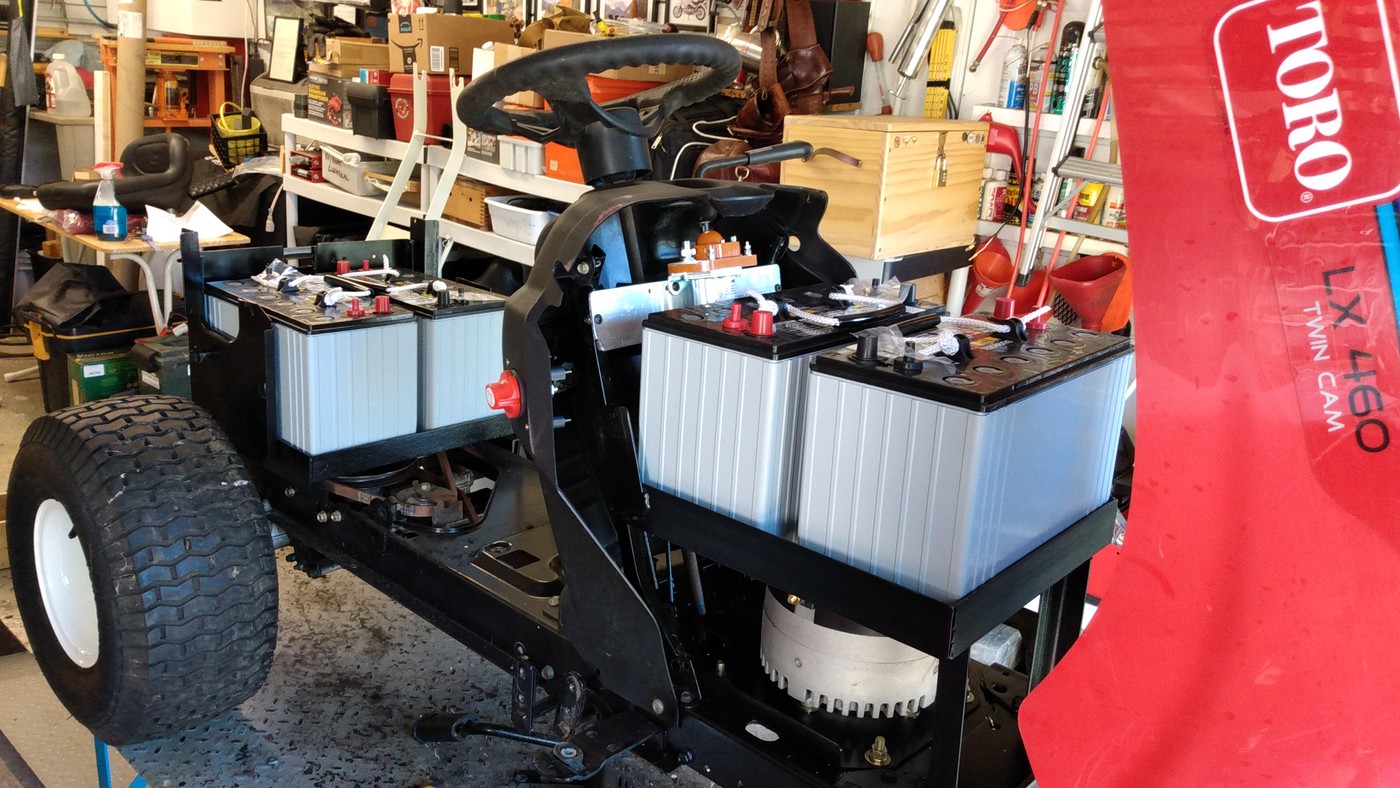
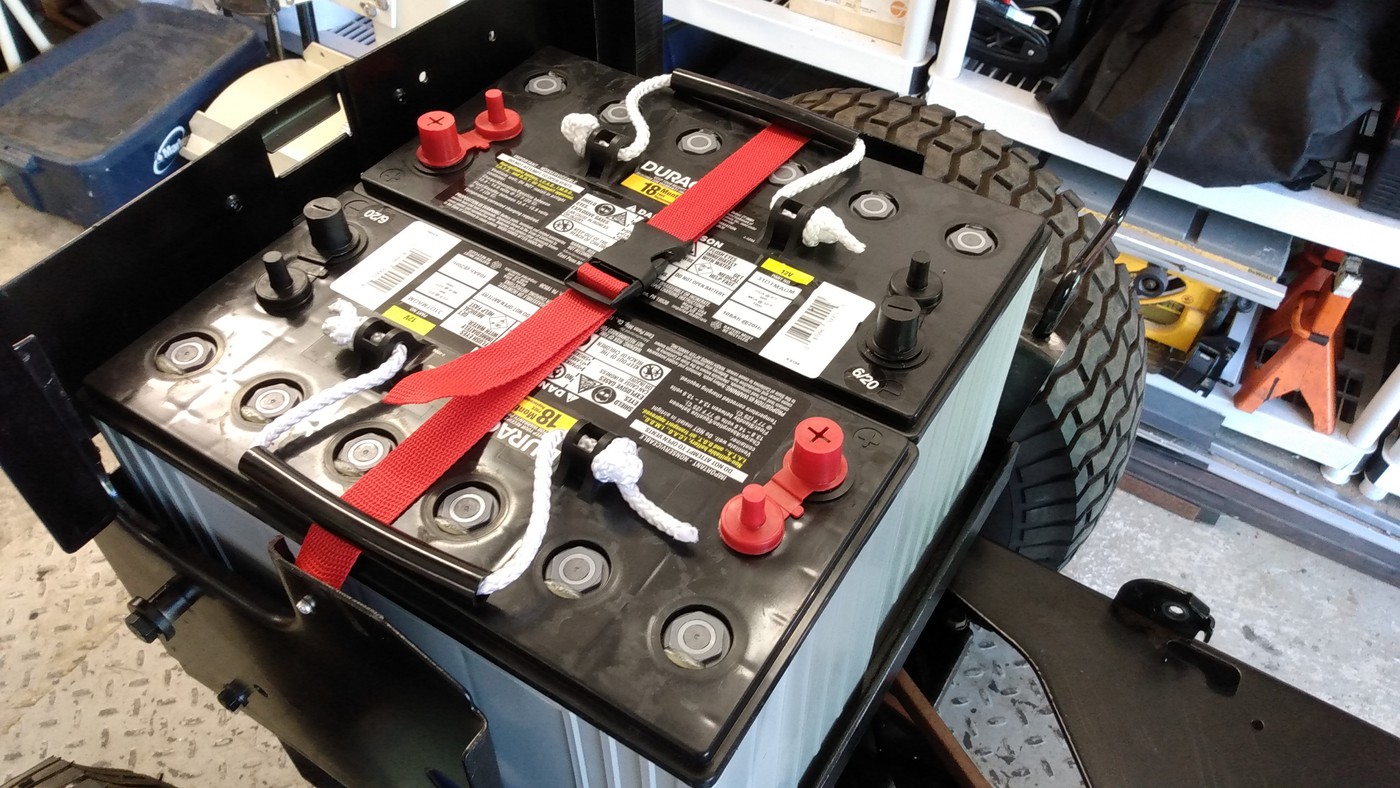
I realized that if I widened the existing, under-seat battery compartment by 1", and raised the seat 3/4 inch, I could mount two of the four batteries in the rear. Great weight distribution. A few pieces of angle iron and a welder....done!


IMG_20200524_195658875-vi.jpg


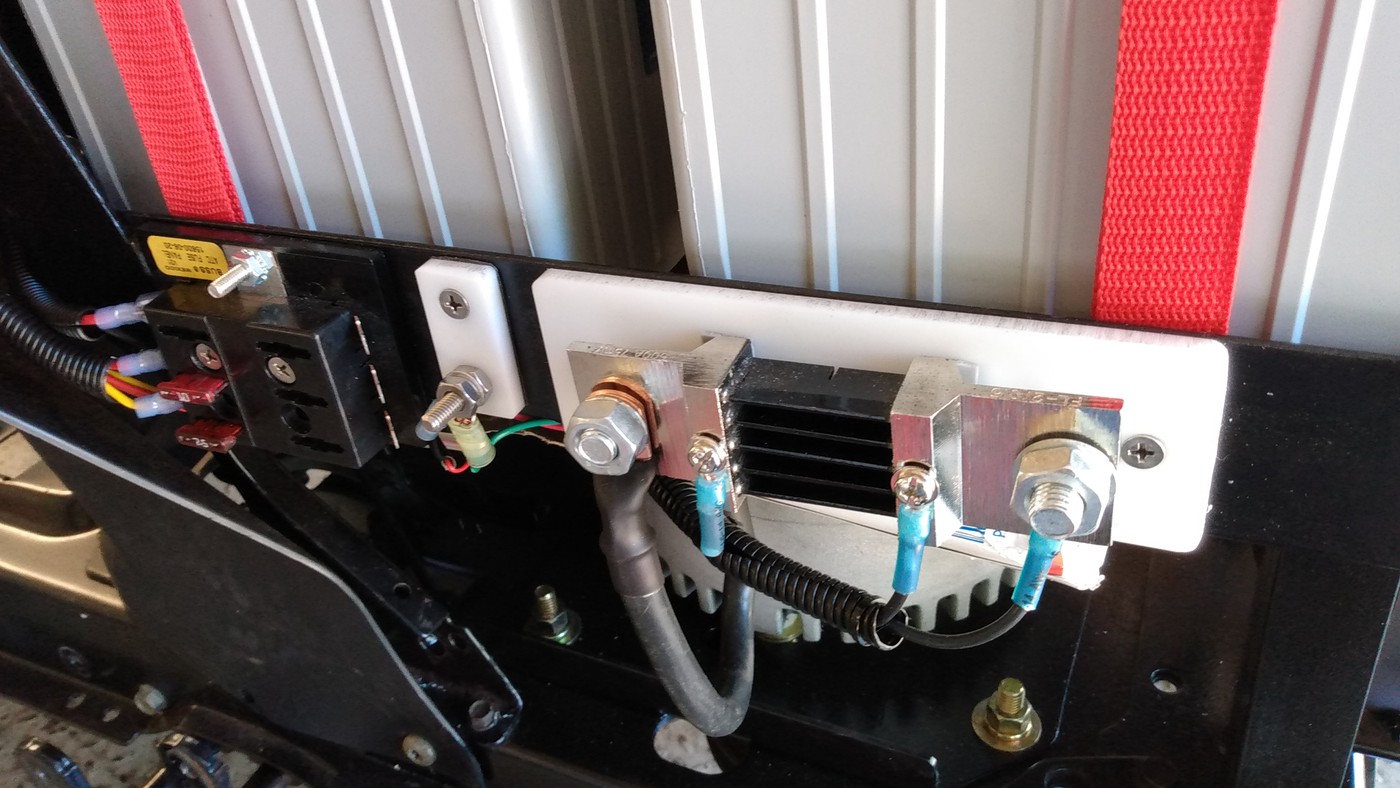
Need to fabricate a front battery rack, do some wiring, install batteries and we are mobile!


This project started with a John Deere 214 that I bought without a motor. I purchased a Honda GX390 gas engine to power it but then decided on electric. As I was getting ready to fabricate a mount for the electric motor in the 214, my son-in-law offered this pristine condition Toro that had a non-running engine. The Toro seemed much easier to mount the motor and being a smaller, lighter tractor will suit my lawn mowing needs better.


I posted the Honda engine for sale on Facebook Marketplace and a fellow drove three hours to buy it. (Going to use it on a homebuilt bandsaw mill) While at my house he saw the none running 20hp Toro engine and bought that too! Nice!


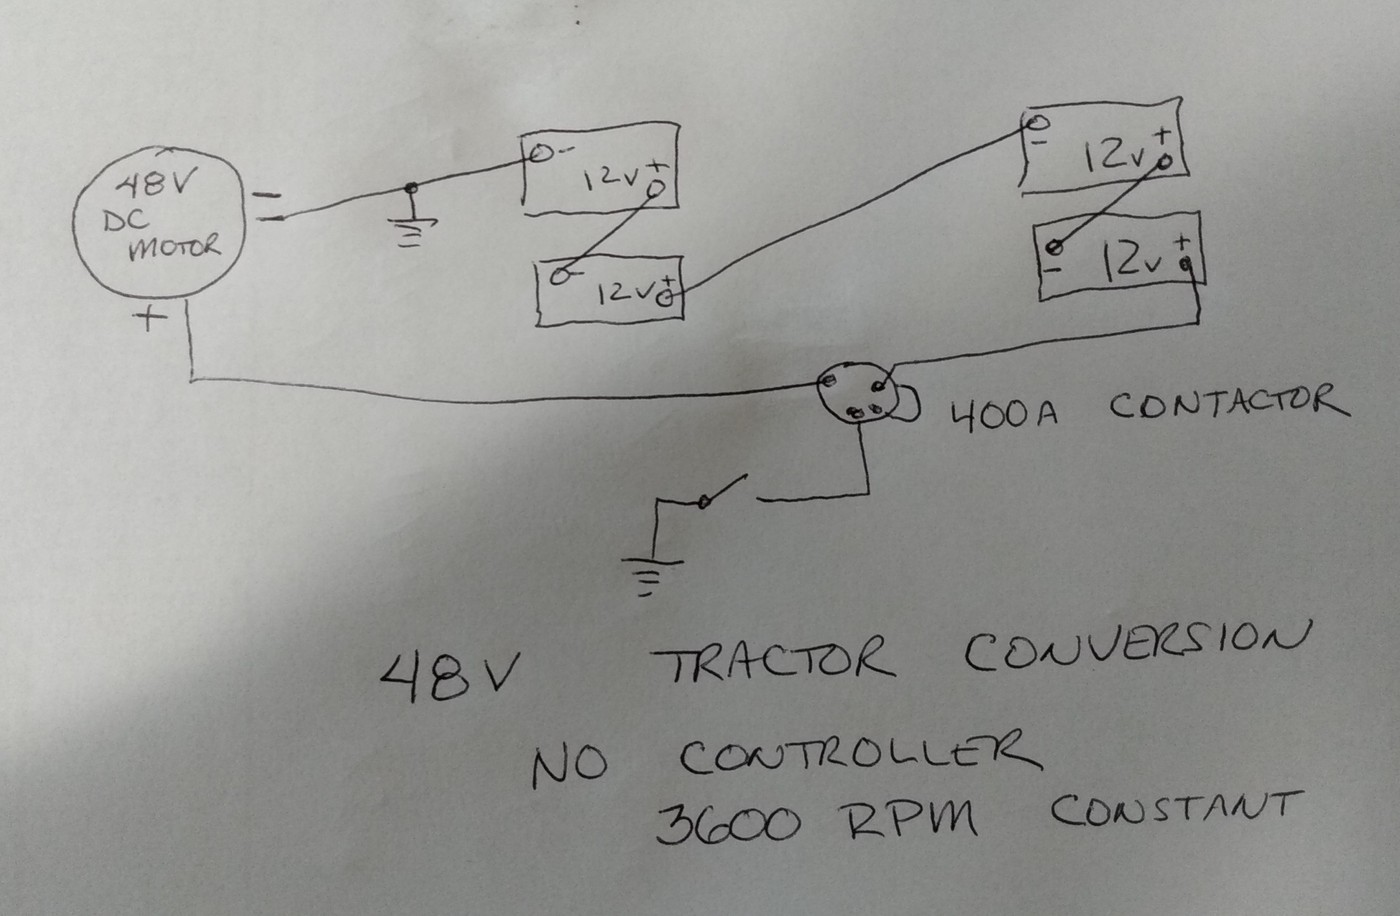
Now I need to purchase 4, 12V Group 31 batteries for the 48v DC motor.......


Stay tuned!
 
Welded up a couple holders for the four batteries. Two in the front, two in the back.....I haven't bought batteries yet, but I just had to see if it works...Pulled the two 12V deep cycle batteries out of my RV and ran the motor on 24V.....IT'S ALIVE!

Ran great!.....Transmission controls speed perfectly. Brakes work....Good to go!

Tomorrow I'll source batteries, put the wheels and tires back on, and drive it around!

IMG_20200526_183016123-vi.jpg


IMG_20200526_183003024-vi.jpg


IMG_20200526_0927507602-vi.jpg
 
Is there enough space between the motor and the batteries that will be sitting on top of it so that the motor still can get airflow through it?
 
Is there enough space between the motor and the batteries that will be sitting on top of it so that the motor still can get airflow through it?

We shall see! I'm attaching a remote LCD thermometer to the motor so I can monitor heat. I have a 6" 12v computer fan that draws very little current that I'll install if things get dicy. It will get its 12v from a DC to DC converter (48v down to 12V/30a)

There is a 1" space between the batteries and the batteries are an inch above the motor.

If none of this works, there is room in front of the motor for the batteries. I mounted them where they are to move as much weight off the front axle as possible. My concern is this is a "Lawn Tractor" not a "Garden Tractor".....It's a lightweight. The batteries are 360#....The motor was 92#, full gas tank 16#, starting battery 35#, Everything else associated with motor that was removed 25#... = 168#....So I'm adding 192# to the tractor. I weight 185#.....That's a lot of weight for those little tires and axles.

The mower deck will be mounted off the front, so when raised, that a whole lot of weight on the front axle.....

I have a John Deere 214 sitting nearby that ultimately all of this might move to. But for my first attempt at an EV, this Toro was a MUCH easier conversion......I'm learning lots as I move along.
 
I drove two hours to NH to pick up four 12V, AGM, 100aH, Group 31, Deep Cycle batteries from Sams Club....At $179 each, easily the best deal on planet earth for quality deep cycle batteries......And no sales tax in New Hampshire!

IMG_20200527_155745578-vi.jpg


I mounted the contactor on an aluminum bracket I fabricated

IMG_20200527_155530404-vi.jpg


Cut a hole in the dask for the battery monitor

IMG_20200527_155615569-vi.jpg


And mounted the "Oh Sh#T" deadman switch next to the old ignition switch which I intend to use as the main power switch.

IMG_20200527_155605655-vi.jpg


Just waiting for some 2/0 welding cable and copper lugs to show up from AMAZON and I can wire this thing up and start using it around my propertty.
 
While waiting for wire, I changed the belts and gave the chassis a good grease and lube job. Plugged a small leak in one of the front tires......
 
Still waiting for my 2/0 wire to show up.....I hate waiting when I'm a PRIME customer and supposed to get things in two days!

So I mounted a 12V 129CFM computer fan to keep the motor cool if needed.
 

Attachments

  • IMG_20200529_112850654.jpg
    IMG_20200529_112850654.jpg
    73.7 KB · Views: 348
  • IMG_20200529_112905385.jpg
    IMG_20200529_112905385.jpg
    51.5 KB · Views: 316
The Prime two day thing is two days from when it ships, sometimes they take multiple days to actually ship. I hate it when that happens...
 
While waiting for my 2/0 wire to show up , I figured I'd do most of the 12v/secondary wiring and fabricate a few battery tie down straps. I also had a bit of #2 wire that I used for the less than 6" runs to the various components. I was concerned that I wouldn't be able to bend the 2/0 wire as needed. I'll have to keep an eye on them to see if they get too hot.

IMG_20200531_140335822-vi.jpg


IMG_20200531_140847909-vi.jpg


IMG_20200531_140422157-vi.jpg


IMG_20200531_140412681-vi.jpg
 
It RUNS!...

First test of my Toro Lawn Tractor conversion to electric motor. Only running it on 24V to be safe. Will attach the other two batteries for 48V tomorrow.

Something is rubbing making that clicking sound. Will figure that out.

Has tons of power even on 24V. Put it up against a fence post and it just sat there spinning the tires on asphalt. With over 400# on the rear tires!

Too much fun!

 
That’s awesome! I’ve thought of converting a 582 with a bad engine my dad has to electric. Thanks for inspiration! Looking forward to see more of your electric conversion.
 
Back
Top